Is it easy to install a light bulb camera?
Is it easy to install a light bulb camera?
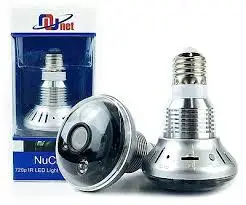
Yes, it is relatively easy to install a light bulb camera, as these cameras typically require minimal setup and can be installed using basic tools. The process of installing a light bulb camera can vary depending on the model and type of camera, but there are some general steps that most cameras will require.
Step 1: Choose the Right Camera
The first step in installing a light bulb camera is to choose the right camera for your needs. Light bulb cameras come in different shapes, sizes and capabilities, so it's important to choose a camera that meets your specific requirements.
Consider factors such as the camera's resolution, field of view, motion detection capabilities, and whether the camera can connect to a local Wi-Fi network. Some cameras require a hub or additional hardware to operate, while others are standalone and can be installed directly into a light socket.
Step 2: Preparing the Light Socket
Once you have selected the camera, the next step is to prepare the light socket for installation. Turn off the power to the light socket and remove the existing light bulb if there is one. Make sure that the socket can support the weight of the camera and that it is compatible with the camera's form factor.
Step 3: Install the Camera
The next step is to install the camera into the light socket. Most light bulb cameras screw into the socket like a regular light bulb. Some cameras come with adapters to fit different socket types or to adjust the angle of the camera. Make sure the camera is securely screwed in and that it is facing in the right direction.
Step 4: Setup the Camera
After installing the camera, the next step is to set it up. Depending on the camera, this may involve downloading an app, connecting to Wi-Fi, and configuring the camera's settings. Follow the instructions provided by the manufacturer carefully to ensure that the camera is set up correctly.
Step 5: Test the Camera
Once the camera is set up, the next step is to test it. Turn the light socket back on and check that the camera is working properly. Check the camera's video feed and make sure that the video quality is good and that the camera is capturing the area you want to monitor. Adjust the camera's angle if necessary.
Step 6: Mount the Camera
If the camera is not securely fastened to the socket or if it is obstructed by other objects, it may not work properly. Consider mounting the camera using a bracket or other hardware to secure it in place. Make sure that the camera's view is not blocked by any obstructions and that it has a clear view of the area you want to monitor.
In conclusion, installing a light bulb camera is a relatively easy process that typically involves choosing the right camera, preparing the light socket, installing the camera, setting it up, testing it, and mounting it if necessary. Most light bulb cameras come with detailed instructions and require only basic tools and knowledge to install. However, it's important to carefully follow the manufacturer's instructions and take precautions to ensure that the camera is properly installed and secured.
.jpg)

.jpg)
评论
发表评论